Monday, March 13, 2017

Water Quilt Mini Tutorial


This quilt is created in layers, and you'll need some fine netting, a touch of sparkle netting, Angelina Fibers (fusible type), white cheesecloth (washed), water soluble stabilizer, free-motion foot for your machine, an embroidery hoop that you can get under the foot of your sewing machine (or take the foot off to put it in place, then replace the foot) and a blend of sparkly beads in addition to your usual quilting supplies. 

Wash and dry your cheesecloth (don't unfold it before washing - you will need about a yard or more to play with, as it will shrink up).  Fuse long, thin sheets of Angelina Fibers between layers of parchment (so it doesn't stick to your iron). Create a panel of fabric (this will be your background) with free-hand cutting and piecing with curves, to simulate waves on the ocean).

Place the outer part of the embroidery hoop on your tabletop.  Layer strips of washed cheesecloth between soluble stabilizer, and then push the inner hoop down inside and tighten hoop.  Free-motion quilt / embroider overlapping circles all over the cheesecloth, making it heavier towards one of the long sides (this will be the lower / loose edge).  Remove the stabilizer by soaking / rinsing to removing all of it (follow maufacturer's instructions for the brand you have) and then let dry.

 Layer your backing face down, then batting and finally the main quilt top, which has been freehand cut and pieced to make your background.  On top of that base layer, you will add torn pieces of the Angelina Fiber sheets and freehand cut pieces of cheesecloth and sparkle netting.  Once you have laid it out as you like, cover with a layer of dark colored netting that will hold everything in place and pin.   Quilt your quilt and then either square up or mark a cutting line.  Mark another line 1/4" inside this, with a removable marking pen / pencil, to be a guide - DO NOT add beads beyond this line!

Pin the embroidered cheesecloth in place where you'd like the waves to be, and then quilt it in place with a tiny stipple along the upper edge.  Hand bead the waves, adding more beads toward the lower edges, and use the beading thread to gather up  / shape the waves if desired.  Square up your quilt to prepare for binding.


Bind the quilt using a facing, instead of traditional binding. If you have any waves that will be extending past the edges of the quilt, fold and pin them out of the way before sewing the binding on.  Sew slowly, and hand crank the machine past any beads that are close to the stitching line, so that you will be able to stop and move the quilt, instead of breaking beads or needle.  Fold to the back and hand-sew in  place.  Add a hanging sleeve.

Thursday, April 14, 2016

Knitting, Solid Perfume, Nail Polish and Candles!

As usual, it's been busy around here.  One of my sons is getting married in less than a month and I've managed to finish the shawl, along with another old UFO shawl, made some quick nail polish and solid perfume by starting with ready-made bases for the bridal shower favors and am now busy making candles for wedding favors!  Oh yeah, I'm working on moving in between everything else:-)

First off, the Sweet Dreams shawl.  I barely managed to finish and get it blocked in time to give it to Sam, my son's fiance, and my soon to be daughter-in-law.  I think she really likes it:-)


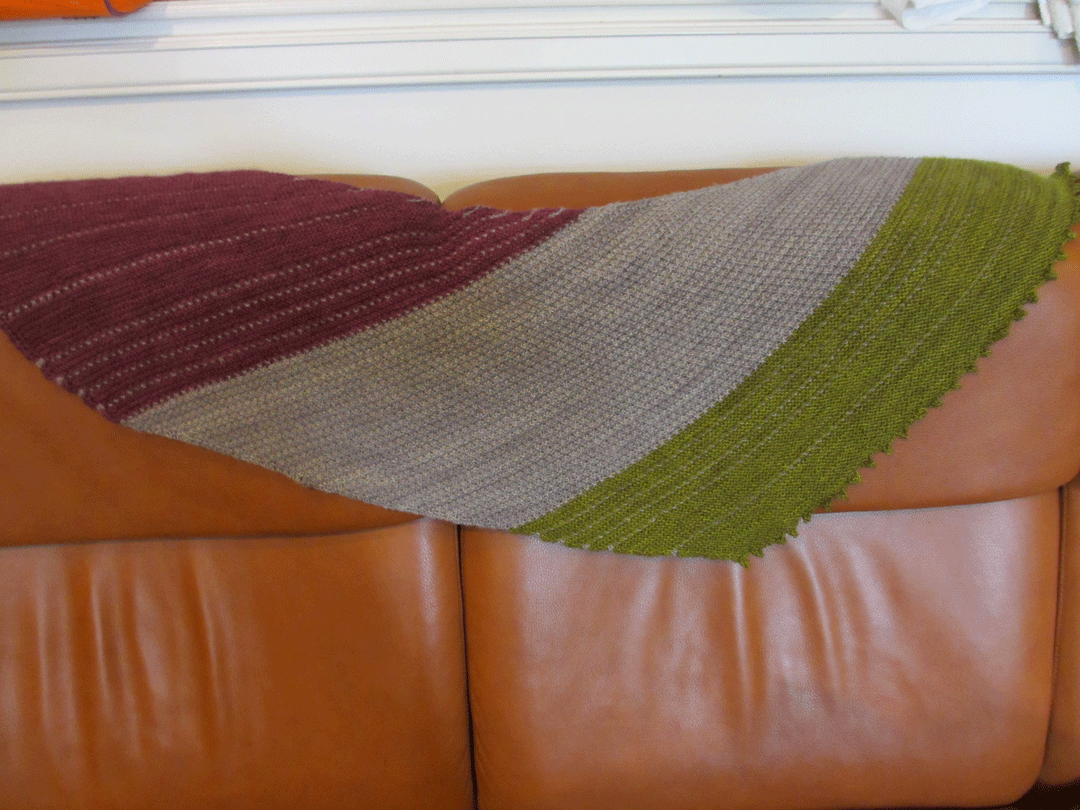
Sometimes my projects get set aside and forgotten for a while.  Eventually, most of them come out and are finished.  Such is the case with this Samen shawl:


.
Bridal shower favors began with pre-made nail polish and perfume bases from Bramble Berry.  They are easy to make if you follow the directions  I figured out how to make labels for my projects before Christmas, so worked up some for these, wrapped them and then put them in this pretty box I found.


I'm making half the candles white and half pink.   Each of my batches is a different scent, and has ended up filling about 11 candle tins.  Most of the time there is enough left to fill a wax tarts mold as well.  I'm burning one candle of each fragrance to make sure the fragrance smells nice, so there will be 10 of each scent to give to Sam and her family for the wedding favors.   The supplies are from Bramble Berry and they had the candle labels as a free download without any scent marked on them, so I'm adding the scents as I print them, so the candles can be labeled with the correct scent.  In case you didn't know, I tend to be a production type of person when it comes to making anything that has repetitive parts.  For these candles, I make candles until I run out of space and then I switch to labeling and packaging mode, repeating until the job is done.


Saturday, March 12, 2016

UFOs finished and projects in progress

My Hazelwood Sweater is almost ready to wear, just a few buttons to sew on later today!  This one was planned to start over a year ago, but finally got going last September.  Of course, it was set aside off and on, but the ends have been woven in and it's been blocked.  Just some buttons and trimming of ends and it will be ready to wear!!!


I've shown you pictures of the Paris Toujours shawl, but it hadn't been blocked.  Well, now it's blocked and it's HUGE, it grew so much, but I love it!  This one is a cotton and wool blend, so I may end up wearing it year round, since it gets cool in the summer evenings.  (Just for a size comparison, those pads I'm blocking it on are made of four 2' x 2' squares, and it is almost 8' wide!)


Have swatched for a couple sweaters (shown above with the shawl and also below), but am really trying to finish up more UFOs before starting either one, however, they're really, really tempting!  The brown swatch is for Amy Herzog's Options Rowan Sweater KAL and will be striped with an off white and coral pink, just like her sample.   The magenta swatch is still under consideration, since I'm waffling between a summer cardigan (Basia) and 3/4 sleeved top (Turks and Calicos), since it's a summer yarn.  Since I really want to try Custom Fit patterns, I've been thinking I could merge Charlie's Cardigan in Custom fit measurements for me with the Basia pattern.


Some handspun yarns have been washed and now feel wonderful and ready to  knit with!   This one is definitely going to be a cowl!


Sam's wedding shawl is almost ready to start the lower edging.  It mostly looks like a pink blob with beads on the needles right now, but if I spread out a little area, the design has really taken shape and I can't wait to finish it!  The pattern is Sweet Dreams.


I've been following The Splendid Sampler quilt-a-long posts and planning to start making blocks.  If you follow them, you'll be able to get all the patterns while it is in progress, but after the quilt a long is over, the blocks will be published in a book by my publisher, Martingale / That Patchwork Place, so if you miss any, you'll still be able to finish your quilt!  Some of the block designers (not sure how many) are also making other quilt designs with the blocks and I believe  at least some of those designs will be included in the book when it is published.  So far, I have been collecting patterns and fabric, with hopes to start making blocks soon!

Of course, I couldn't decide to make one sampler quilt, I also fell in love with the charm of Lori Holt's Bloom quilt and bought a kit so I could start it right away!   She's doing a sew-a-long on her blog.   All the pieces are cut out, except the outer border, because I'm thinking of changing it a bit and have purchased more of one of the coordinating prints.   Hopefully, later today I'll start preparing the applique pieces and basting them on the blocks (am waiting for fabric to arrive for some of the stems, and am hoping it arrives soon).


Monday, January 18, 2016

Dahlia Pillow with Flowers from my Book!

Donna Seegmueller sent me some pictures of a beautiful pillow she made using  dahlias and leaves from my book and gave me permission to share it with you.  Isn't it beautiful!


Here's what she said about making it:

"As for some construction details, I reduced the pattern to 75%.  I selected the colors from my stash of batiks and applied fusible interfacing, then fussy cut each petal, mirroring the images a couple of times to achieve directional movement one would see in a garden. For dimension on each flower, I heat set all the petals, then using coordinating variegated thread I stitched each petal from its center to its edge only to secure. The hummingbird on the left is an applique, adapted and mirrored from the 3-D embroidery on the right. That design came with my Husqvarna/Viking embroidery machine, in case you need to make note of it. Finally, I quilted the background by tightly stippling between the stems and then switching to outline quilting of the humming birds wings for the sky.

I hope your readers enjoy my creation. I enjoyed the challenge and thoroughly enjoyed working with your design.

Donna Seegmueller
Auburn WA"


I love seeing everyone's projects!

Sunday, January 10, 2016

Knitting, Spinning, and Quilting too!

Last night I finished knitting a Paris Toujours shawl!  It's a wool / cotton blend that is light, soft and fluffy, and I'm hoping will be comfortable not only in the winter, but also on cool winter evenings.


Before Thanksgiving, I finished spinning this Waterlilies roving from The Yarn Wench on Etsy.  Since I had two braids, I combined them and chain plyed, to keep the color changes as clean as possible.  It still needs to be wet finished (soaked and dried), but love how it came out.


After Thanksgiving, the spinning wheel was out, along with braid of wool called Young and Old from Three Waters Farm.  It looked like this while it was being spun:


and this once it was chain plyed:


In 2010, Bunny Hill Designs was doing the Snowbound Block of the Month on her  design, and although I was able to keep up with it for a while, I did fall behind, put it away, and have just pulled it out again.  (If you remember, my book was released in October, 2010, so it was a busy year!)  If I keep working on it, it should be finished in time to hang before Christmas next year.


That's it for now....

Handmade Skin Care for Gifts

As promised, here are the skin care projects made for this past Christmas:


Lots of recipes were tried, most of them made wonderful products that I could gift friends and relatives.  A few came out nice, but need to be tweaked to play nicer in our climate, others were great as they were.  Lip balms were one of my first adventure into making skin care products, along with melt and pour soaps, then there were scrubs made with sugar or salt, and then bath bombs, and then  recently I tried making the bubble bars, and finally lotions!  Most of the recipes came from the Soap Queen Blog and Bramble Berry website, but the solid bubble bath bars are from a recipe I purchased from Two Wild Hares on Etsy.

Of course I made lots of soap this past year since I tend to immerse myself in any new learning adventure, even creating a few of my own soap recipes and participating in soaping challenges.  As a fun challenge, I even tried making soap cupcakes and they were so much fun!


Along the way I ran out of space to dry and store all the soaps I was making, so bought a rack from Home Depot and added extra shelves (husband is using this shelving in our greenhouse for smaller plants, but didn't need all the shelves).  The additional shelves make it great for drying soaps, since I don't have to turn them every day, and it holds a lot!


Because I've made so many different types of soaps and skin care products, and it has gotten way past being able to remember what is in each one, I decided it was time to create labels so my recipients and myself would know what is in each one.  This was my biggest challenge, and luckily, I'd been keeping a soaping journal, and printouts of the skin care product recipes with my mark-ups, so knew what changes I'd made to each recipe!  It took a while to figure out a design that would work and look nice in In-Design software, but I finally figured it out and designed labels for almost everything before it got too late to ship boxes before Christmas!  Whew!!!!


Sunday, January 03, 2016

This past year in knitting and more, part 2

Another shawl (Haley's Comet), this one for a friend:


Yet another shawl (Ashburn) for a friend:


Another hat (Rainy Tuesdays) for my hubby (it's really more blue):


My Peak color cowl is knit, but still needs blocked.  At least I have a modeled picture for this one:-)


This one was given to a friend earlier this year, but I forgot to post a picture, it's the 2015 WestKnits Mystery Shawl:


Our dogs have long hair, so no knitting for them, but one of our sons has a whippet who is always cold, so she was measured and this is my first time knitting a dog garment, so I'm amazed it fits!


Also finished another hat for me, just a quick one:


Knitting, soaping and more...

It's been a busy year and since my last post, much time has been spent baking loads of Christmas cookies that were gifted, making gifts and other secret things that can now be unveiled since they've been gifted, mailed, or wrapped, waiting for a belated exchange!  This post only has the hand knits, since there were many this year.  I'll have to do another with the handmade skin care items that were gifted to others.

An Antler Hat for my hubby:


A cowl (Snowshoe) for a sister:


Apparently, in my haste, I neglected to photograph the cowl for my other sister:-(  At least it was finished and shipped in time!  It is a Brain Frieze cowl.

My future daughter-in-law received several hand knits:
a Nora G. cowl,


Shallows cowl (sorry, this one was also taken while blocking, but the best one I have),


and the SknitsB Mysterie cowl:


An Autumn Blush shawl for Tammy (this was while it was blocking):


More to come, as I had to chop this post in half, because it refused to publish.  Crossing my fingers it works this time!

Saturday, October 17, 2015

Great Cakes Alternative Liquid Challenge

As usual, I'm trying to beat the deadline, and I'm running out of time as I'm writing!  This month it took three tries to get something worthy of the challenge.

My alternative liquid is coconut water.  I'd been wanting to try it, but hadn't gotten around to it, so now was the time!  I wasn't able to find much out other than it is hydrating and contains lots of potassium when you drink it, so I'm hoping it can do the same for our skin!


For my first soap, I decided to also try calendula petals in the lye water, as it imparts a slight fragrance and is skin loving.  The other colorings are madder powder and spirulina powder and I decided to use Bergamot Essential Oil for the fragrance.  It soaped like a dream, maybe a bit too liquid, and I tried a swirl.  Although it did come out way better than I thought it would, it didn't have the contrast and bold coloring I was looking for.


Second try:  Same oils and coconut water, but this time I decided to use Karma Essential Oil blend from Bramble Berry, even though it  discolors the finished soap to brown.  Since I knew that, I decided to color it with darker colorant, alkanet powder, in a large enough amount to hopefully be dark purple.  For a lighter contrast color, I used a combiation of Kaolin clay and annatto seed powder.  Since I wanted to use my column mold again and had seen others make a yinyang with plastic, I thought I'd try that, putting alkanet on one side and the other would be kaolin colored and annatto colored in a faux funnel pour.  With so much planned, I forgot the essential oil, so this one is unscented, but I like the design!


Third time's the charm!  I repeated the same recipe, including the Karma Essential Oil for fragrance this time, although I didn't have another cylinder mold, so used a loaf mold and did a swirl like I did the first time.  The difference was that this time the soap batter was a bit thicker from the fragrance (and a little more stick blending) and the top was sprinkled with cranberry seeds and strawberry seeds for a little additional color.  This is my favorite!  I never thought I would be able to get such a beautiful soap with all natural ingredients!


Sunday, October 11, 2015

Pink Applesauce and more!

Yep, my applesauce really did come out pink!  It's a blend of pink fleshed and white fleshed apples from our trees, and we ended up with 18 jars!!!.


Now we don't just have apple trees, we have a variety of different fruits, but they're really just baby trees that are starting to produce more than we can eat fresh, so I have to find more ways to use and preserve them. Before making the applesauce above,  The pears were getting way too ripe, so I made spiced pear butter and spiced pear sauce, and before that it was the pickles, so the cupboard is getting filled up!


Today was the day to make something with Asian pears, so I tried the recipe - Asian Pears in Honey Syrup from The Joy of Jams, Jellies and other Sweet Preserves.  A couple ginger slices are at the bottom of each jar and the syrup has not just honey in it, but also lemon, so it's not too sweet and there's plenty of lemon flavor in there.  We'll let these sit a little while to soak up some of the ginger flavor and then they'll be ready (of course, they're ready now, but time will blend the flavors better).  After two batches, there are now eight quart jars cooling on the counter!


Have a bit of cast-on-itis, since this month is Plucktober, celebrating Plucky yarns in their Ravelry group.  Of course I had already picked out about four projects to work on, but then some people started making cute sheep hats and I had to make one too!  It's called the Baa-ble Hat.


Thursday, September 24, 2015

Knitting projects finished up!

For some reason, little finishing details tend to bog me down.  Projects get almost done, but need things like ends woven in, stitches picked up so an edging can be knit, hems, blocking... the list goes on.  In an effort to have less UFOs hanging around (I have sooooo many projects), I've been actively trying to get some finished and making progress!

Capall Dubh finally got it's buttons sewn on:


Bartender's Choice Mitts, to keep hands warm:


Ring of Kerry cowl:

Dessigne-moi un Mouton pullover is so cozy:


Trying to finish Beach Walk (a shrug with lacy details down the center back and just above the ribbed cuffs), Am over halfway finished and if I keep at it, maybe I can finish it soon!