Showing posts with label embellishing. Show all posts

Sunday, August 19, 2012

Firefly Sewing Envelope is Finished!

My Firefly Sewing Envelope was begun in Sue Spargo's class during Quilter's Affair in Sisters, OR this past July.  It is the first time I've been able to get into one of her classes, and I had a wonderful time!  There are so many different textures to play with, and then you can take the embellishing as far as you want with embroidery, beads and ribbons.  It was one of those projects that was hard to pot down, although not possible for me to work on in the car.  I've been continuing to work on it, and have finally finished it!  She demonstrated many stitches and techniques in class and also taught us how to make the felted balls to decorate the zipper pulls, so I'm finally able to make whatever color I want, although it will be trial and error to make them in other sizes:-)

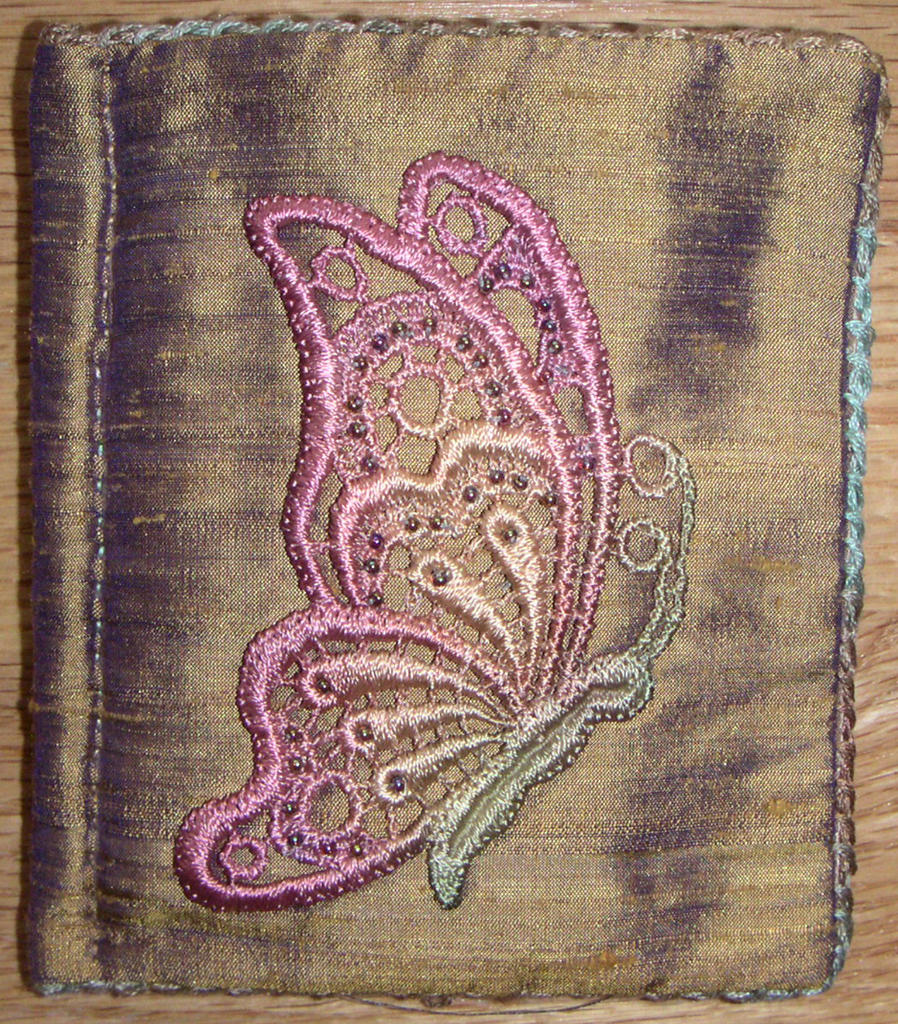
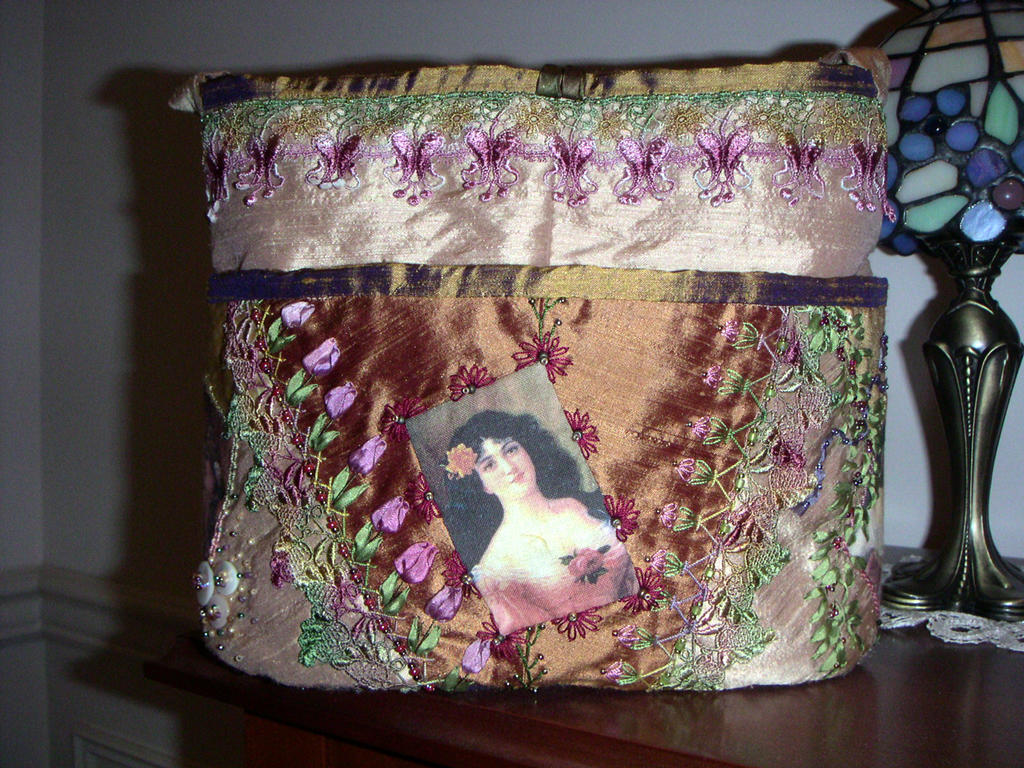
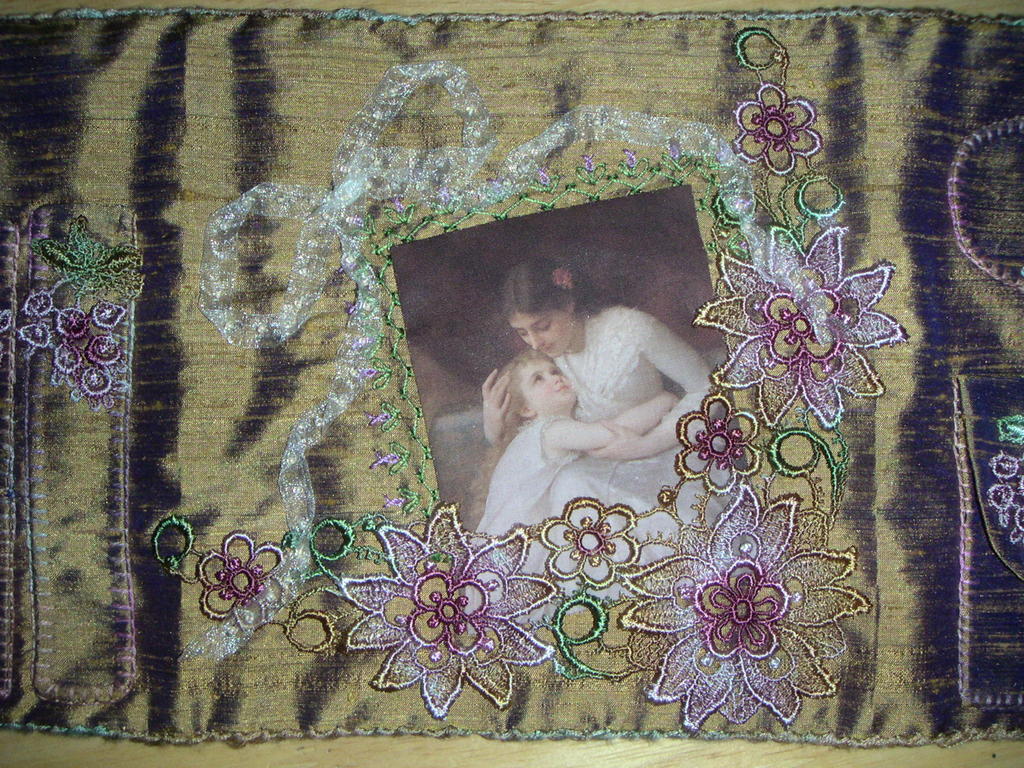
Anyway, this is my cover.  The bird off to the right is a covered button to keep it closed.


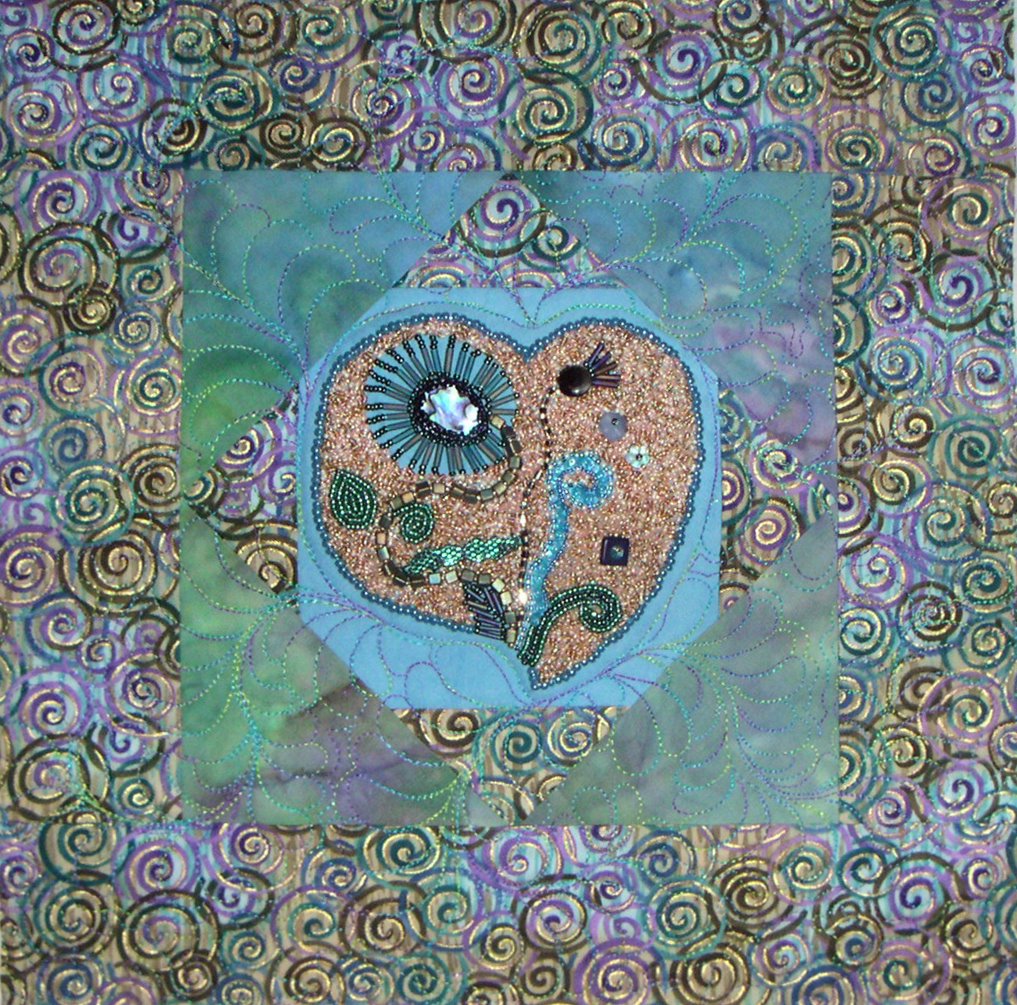
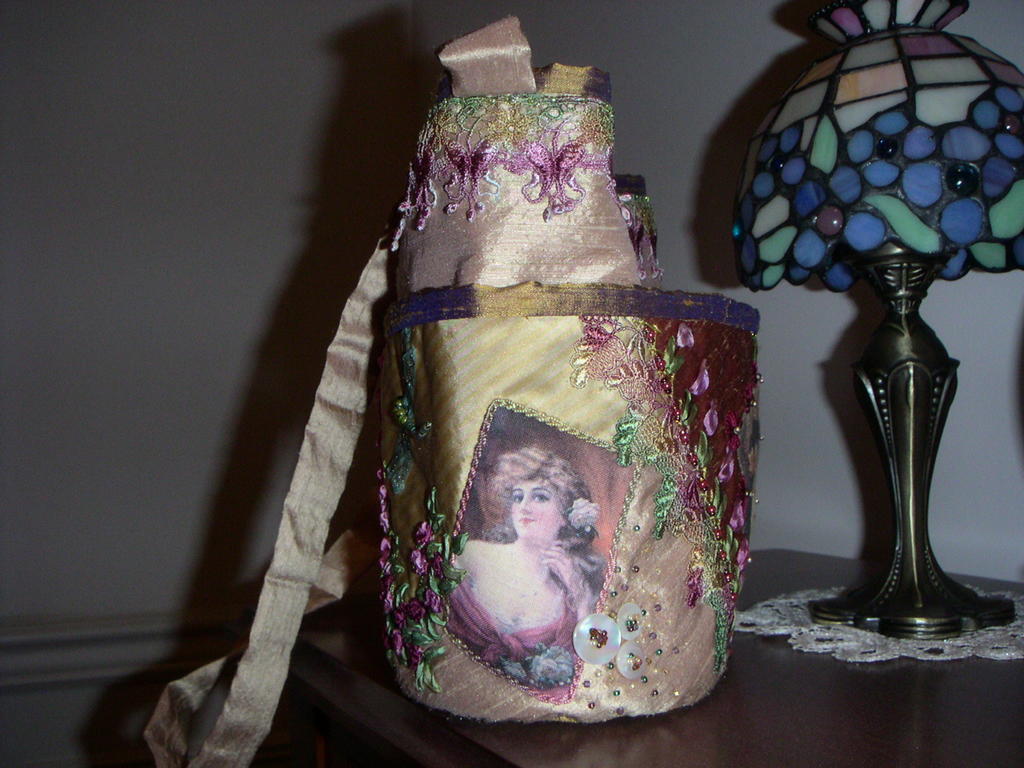
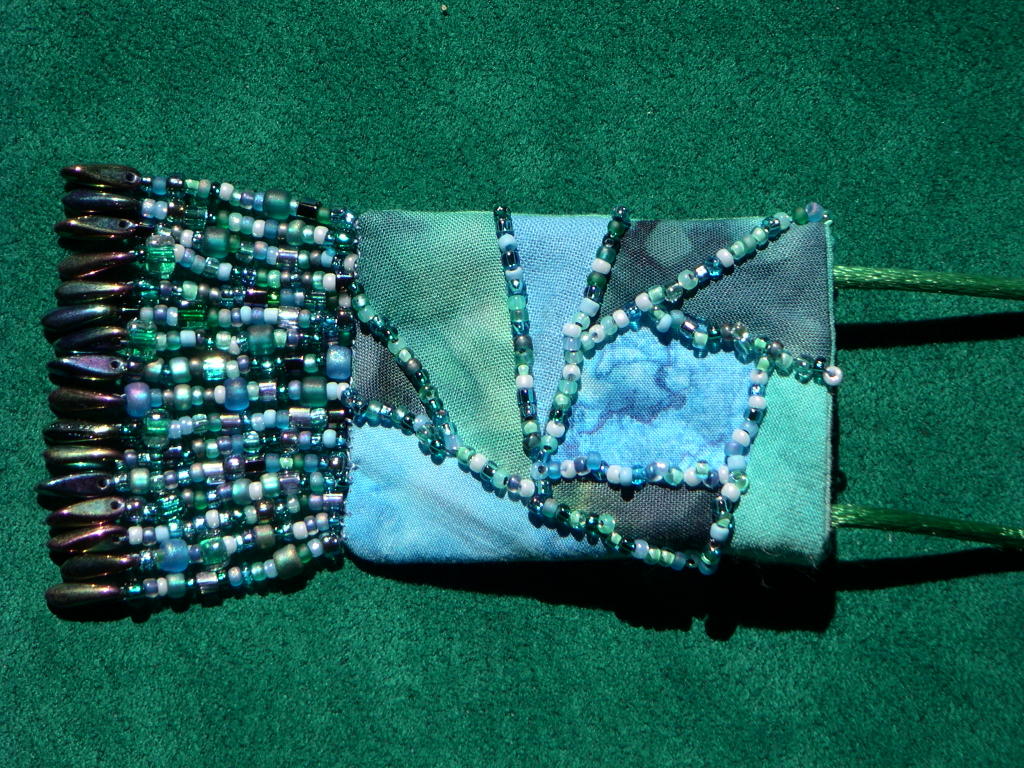
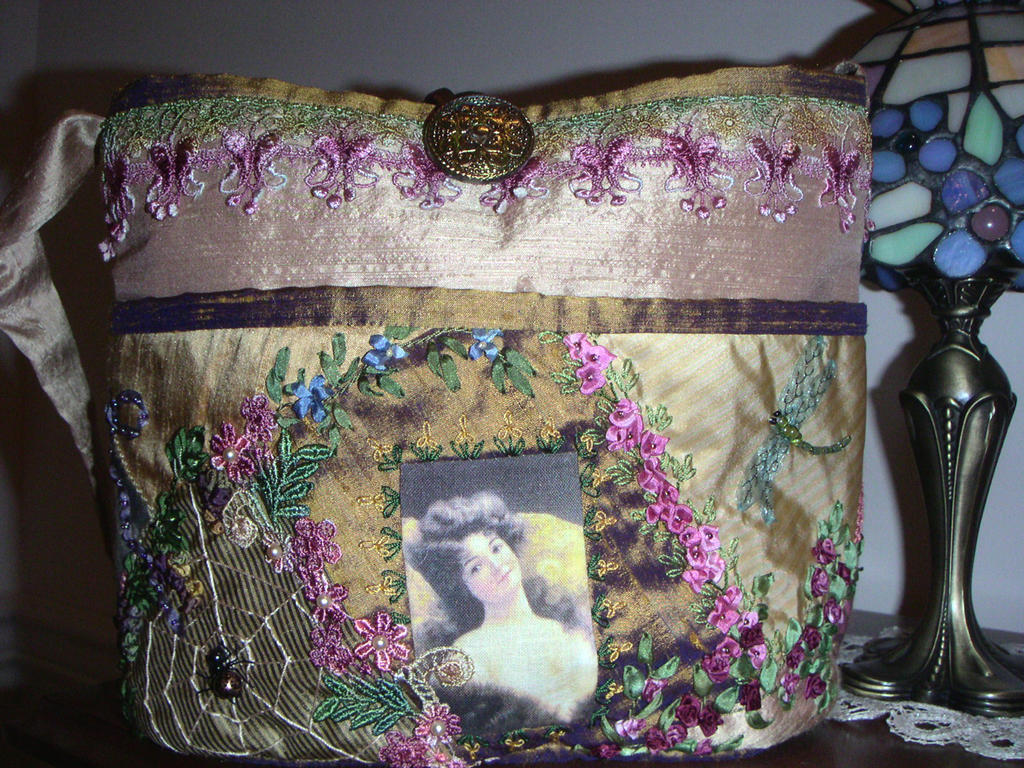
And here is the back:


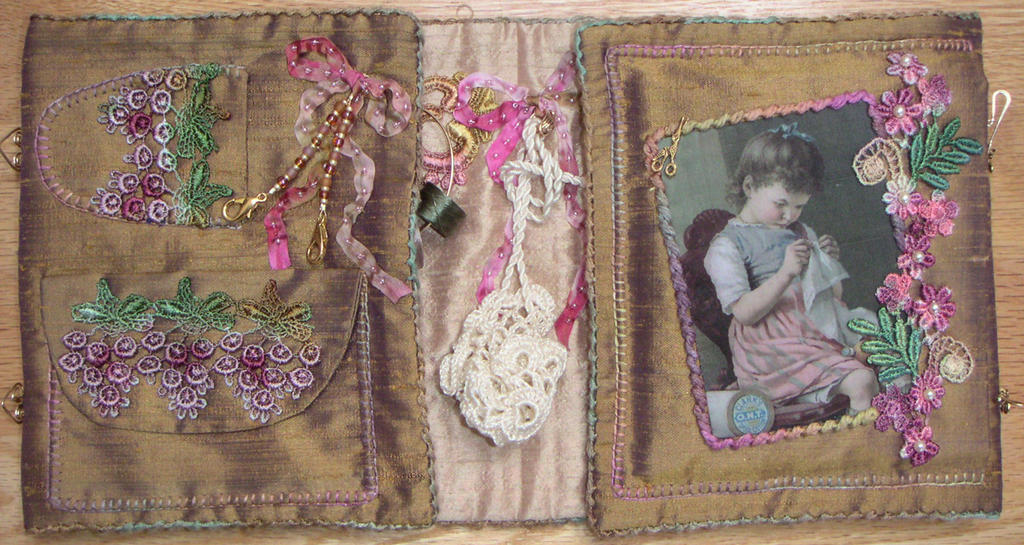
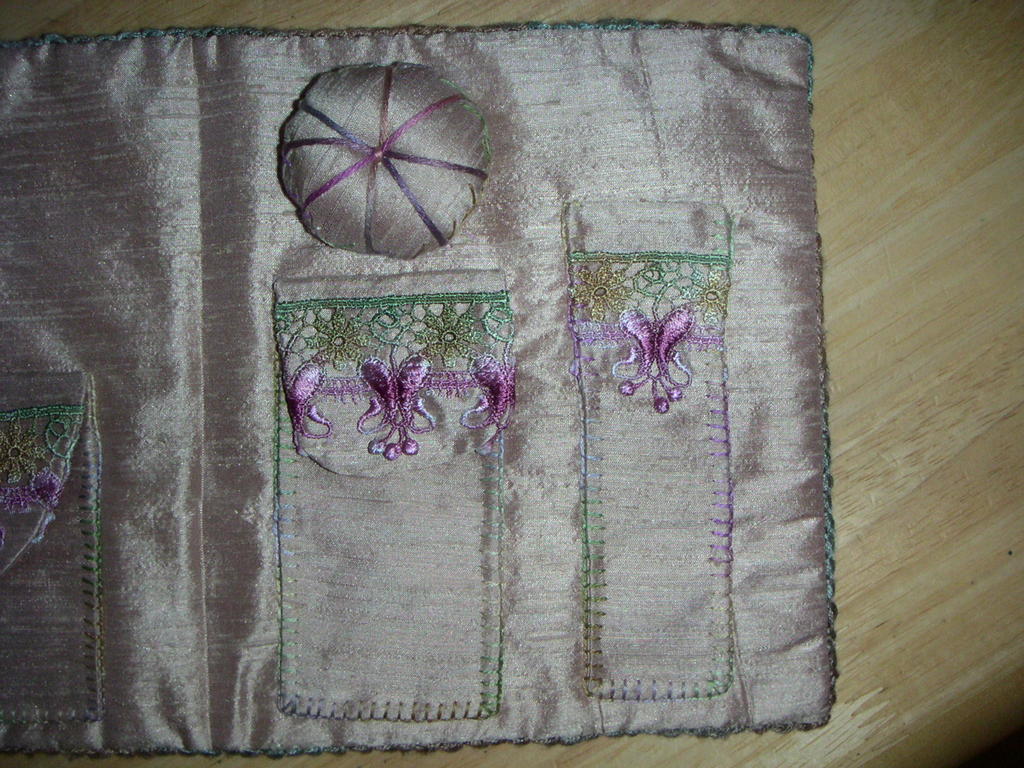
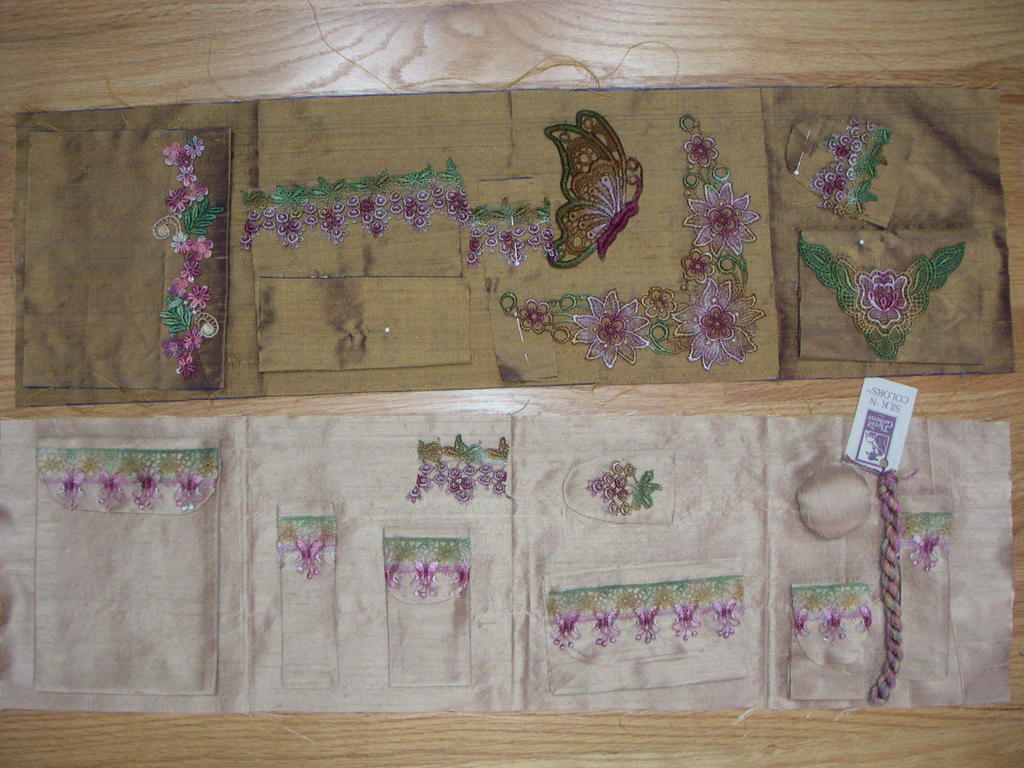
It is a tri-fold design, so this is how the outside looks when laid flat.  The left section has pockets, upper ones have a flap to keep contents inside, while lower pocket is divided to hold tools / pencils, and the back cover is a large flat pocket that could hold a notepad, stencils or small cutting mat.


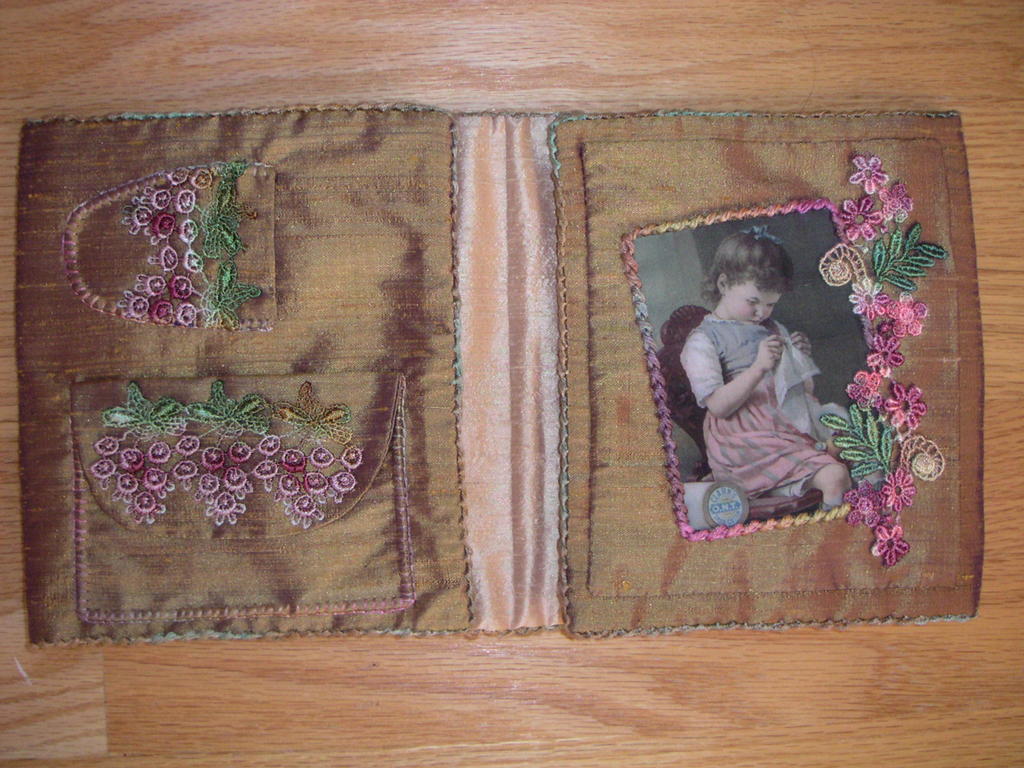
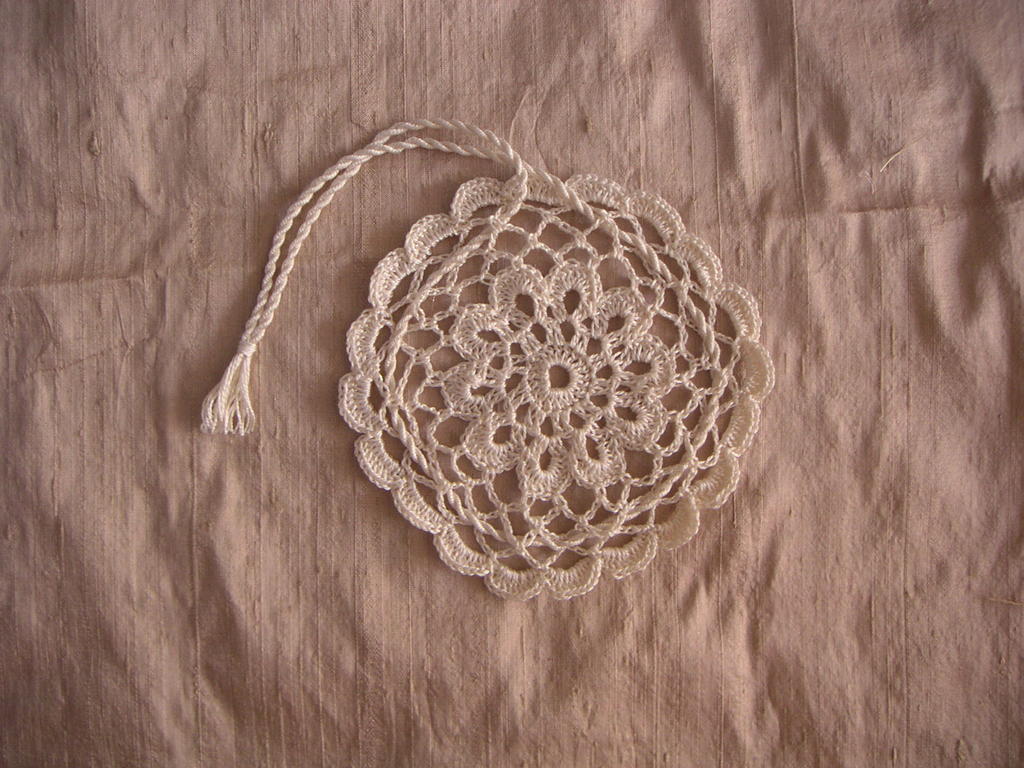
The inside of the sewing envelope has zipper pockets on each side which could be left as one large space, or divided.  I chose to divide each of mine in half to hold medium sized tools, threads, or other things.  The center of the interior has a needle book and a flower applique with a pincushion center.


All that's left is to fill it with my tools, so I can begin using it!

(I wonder if I could use the tri-fold idea to design something to take my sketching / painting with me - of course I wouldn't embellish it nearly so much.)

Monday, January 16, 2012

TAST Weeks 1 and 2

A few weeks ago, I said I was going to take part in TAST 2012 (Take a Stitch Tuesday) and I've been working on it in different ways, but hadn't sorted out the "how" part  for myself, because I didn't just want to do rows of stitching samples, I want it to work on something that will become something more than just a stitch sampler.  Finally, I decided that I'd really like to try to make a garden with these stitches, experimenting as I go and hopefully the results will work out.

The first week was Fly Stitch,  and I was experimented working on a light hand dyed linen.


The stitches were ok, but it wasn't the look I was hoping for, so I went in search of a fabric that was more green and began again.   This past week has been Buttonhole Stitch, so I added a little more stitching.  I'm still not happy with what I've done so far, but may keep working on this one and see where it goes, or maybe continue working on both pieces.......


During my search, I found a stitch sampler that I made several years ago and thought you might like to see it.


Monday, February 09, 2009

Some free motion work

This is a new sea sponge I made yesterday - do you think it looks anything like a basket sponge? Originally, I had intended for it to be golden colored sea sponge, thin enough to see through, even though you really can't do that with the real thing, but I just kept adding layers until I ended up with this: Still planning to make a lighter, more sheer little project, I decided to create a leaf. At least this time I was able to stop while it still had a few open spaces. Maybe I shouldn't work so late into the night?


No, I don't have a specific project in mind, I'm making some new samples for the first Creative Twist class that is being held here in Woodinville, at Fresh Air Farm. It is a continuing bi-monthly class where we will be exploring all sorts of techniques, with this month's lesson being free motion lacy techniques on water soluble stabilizers. I'm hoping our weather will cooperate, so we can have fun in class and not be snowed out. We're keeping our fingers crossed.

Wednesday, November 14, 2007

embellished green velvet


This will be the outside of an evening / party purse that I've got in progress - almost sewed it together without taking this photo. I thought it might be nice to have a picture of what it looks like when it's flat and you can see all the emellishment at the same time, because once I sew it into a bag only one side will be visible at a time. I did roughly pre-fold the velvet to help plan my layout, but it was still one of those gut instinct projects, although I did take notes as I went along so that I will be able to create a pattern to make another.


Sunday, August 26, 2007

Sumptuous Surfaces seashore finsihed

Originally, I had wanted to have more variety of stitches in this piece, and the whipped spiderweb sea stars just proved to be impossible (for me anyway) on top of the cheesecloth that I started with. Since I wanted the scrunched texture, the needle would catch as I worked, and many things were ripped out along the way, making me change plans and stitches used. Even though bouillons and cast on stitches were problems for me in the past (and in some places here - due again to cheese cloth), I found that if I worked them in the more open areas, before the other stitches were added, and used the right needle, I eventually got the hang of them. Many of the threads used in this project were hand-dyed by me in varigated sea colors. Of course, there are things I wish I had done differently, but in the end I'm happy with it.

Saturday, August 18, 2007

Sumptuous Surfaces - shoreline

Last night I had a little time to work on my class project, and decided to get started. As I was going through my stash these fabrics were the ones that attracted me for the beach idea I had sketched out (so the grapes will stay in the sketchbook for now). The base is a 32 count linen, while the teal and white are cheesecloth. The teal cheesecloth is crinkly from being dyed, but the white is smooth and flat because it is new, and I've already manipulated the weave into a more holey texture in preparation for embroidery. At first I tried using the scroll stitch for the outline, but kept catching the raw edges of the cheesecloth, so ended up using a twisted chain stitch instead.

Wednesday, August 15, 2007

Sumptuous Surface shell FINISHED!

Well, I stitched in the car, and then I started adding beads, beads, and more beads. Tonight I really wanted to finish it, so I just kept going until it was finished (about 5 minutes ago)! My legs were stiff when I went to stand, because I had sat in the same position for so long. (When I'm close to finishing something, I like to keep going until it's done.) Maybe some will say I should have left it more open, but I'm happy with the way it came out.

Friday, August 10, 2007

Sumptuous Surfaces - the fabric

I was asked what fabric I'm working on, and thought I'd answer here, just in case others are wondering. The fabric is a dark cream colored linen, and I want to say 28 count, but am not really sure since it was pulled from my stash.

Thursday, August 09, 2007

Sumptuous Surface more progress

Even though I haven't had much time at home to work on my class project, I have managed to move forward making a pulled thread area, buttonhole wheels, whipped spider's wheels, buttons and metal rings attached with woven bars. I still would like to add some suffolk puffs, and then I think I'll start filling in the rest with french knots, cast-on loops and other smaller stitches.

Wednesday, July 18, 2007

Sumptuous Surfaces class progress


I'm taking another class at joggles.com, this one being the Sumptuous Surfaces class with Sharon Boggon. Above are pictures of my journal, with today's notes and sketches of ideas for her class. It remains to be seen if this is the sketch I'll work with by the time we start working with fibers, but right now this is the idea that's calling me.

Wednesday, July 11, 2007

CQ purse


This purse has been in progress for over a year. It all started with the flap, which was pieced by Maureen Greeson. She made the CQ backgrounds for a group that I was a member of, but has sadly disolved. (Previously, I had been working in a rainbow of colors on some very large 20" blocks, which still need to be assembled into a quilt.) As I embellished the rectangle, I thought I'd like it to be more than just a small framed piece, and the idea of a purse began. I cut a couple rectangles of cotton fabric for the foundation, and then used a sew and flip method to piece the rest, adding lace and ribbon as I went. The embroidery was fun, but I decided that a purse would have to be more durable, so tended to go with embroidery that would be more durable, especially for the back (although I didn't want it to be plain). Maybe someday I'll a trim around the flap, but couldn't find anything I liked, so for now this is how it will be.


Friday, February 24, 2006

Heavenly Hearts IV - in pink!


This pink version was started during a demo that I did at Gathering Fabric earlier this month. Now it is finished, and I'm having a difficult time deciding whether I like the pink or purple best. What do you think?

Enjoy browsing my blog,
Lynn

Wednesday, December 21, 2005

Beaded Heart Mini-Quilt

The center of this quilt was beaded over a year ago, and hanging on the wall waiting for me to make it into something. After being asked to do a beading demo, it was time to finish up some of my projects, with this heart ending up in the center of a small quilt. The quilt is only about 12" square, and the tan beads filling the heart are size 14 and 15 seed beads, so that was the most time consuming in the whole design.

Monday, October 03, 2005

Hussif and Needlecase Complete


Well, my hussif and needlecase are finished! The hussif is made up of four sections, and the right and leftmost ends fold in towards the center, then it folds in half, like closing a book. It's been an interesting project, with the hardest part deciding what to include and how I will attach all my tools and how to hold my threads, as well as how to keep it closed. The easiest part was the pockets, although the embellishing was the most fun! The top row is the inside of the hussif (left half, then right half), second row shows the cover back and front, and then the second picture is the inside part of the cover. Last is the needlecase, which fits in a pocket that is under the picture of the little girl sewing. I ended up doing some wirework, using jewelry wire, to make rings and straight thread holders, as well as a hook and eye closure to hold the hussif closed.

Hope you enjoy the pictures,

Lynn M

Sunday, October 02, 2005

Pursif Finished


Finally, my pursif is complete! I'm still trying to finish the last little details on my hussif, and then I'll post pictures of that too.

Come visit again,

Lynn M

Tuesday, August 16, 2005

hussif almost finished


My hussif has four sections on the inside (peachy cream) and four on the outside (gold), including the cover. The first picture shows the two ends of the outside folded in, and the second is the inner section with my pin cushion. The last picture is my hussif cover (picture taken with the hussif spread open).

Wednesday, July 27, 2005

Hussif and Pursif Progress


Well, I promised pictures, so here they are. The upper picture is of my thimblecase, which is really just a tiny doily that I made from one of my crochet books, that has a twisted thread cord that can be tightened to close it. The lower picture shows both the outside (gold), and inside (cream), with all the machine stitching finished, ready to finish sewing the laces on and then the pockets to the base fabric.

Well back to work,

Lynn M

Monday, July 11, 2005

Another Amulet and more


Another amulet! This one is not in my patterns, although the previous ones and more are in my pattern "Awesome Amulets", which is available at the shops listed under "links".

This week has been busy! My husband is taking some time off, and we just picked up our new boat! So while he is busy installing electronics so that we can take it out, I've been busy working on a really large quilt. It will be an oversized king when it is finished, and so far I've made two sizes of star blocks, the largest of the half log cabin triangles, and am busy working on pinwheel blocks. I started with a large fat quarter pack of the "Gingham Rose" by 3 Sisters for Moda, but quickly realized that I needed to get some larger pieces for the border and binding, and more.

I also have a huge crazy quilt in progress that I hope to finish by the end of the year! There are twelve 20" blocks that are almost finished. They will be put together with sashing and layered with batting to help protect the backing fabric from the knots, etc. Since I am planning to do either regular quilting or sashiko style quilting in the sashing and border, it still has a lot of work to be done, and will require a regular binding to finish the edges.

Well, enough for now,

Lynn M
LAM Designs